
| 일 | 월 | 화 | 수 | 목 | 금 | 토 |
|---|---|---|---|---|---|---|
| 1 | 2 | 3 | 4 | |||
| 5 | 6 | 7 | 8 | 9 | 10 | 11 |
| 12 | 13 | 14 | 15 | 16 | 17 | 18 |
| 19 | 20 | 21 | 22 | 23 | 24 | 25 |
| 26 | 27 | 28 | 29 | 30 |
Tags
- TensorFlow Object Detection Model Build
- Git
- 사회초년생 추천독서
- paper review
- TensorFlow Object Detection API install
- Branch 활용 개발
- DOTA dataset
- CARLA simulator
- 리눅스 빌드
- Paper Analysis
- 객체 탐지
- Linux build
- Docker
- DACON
- TensorFlow Object Detection 사용예시
- Towards Deep Learning Models Resistant to Adversarial Attacks
- 개발흐름
- Object Detection Dataset 생성
- VOC 변환
- object detection
- 논문분석
- InstructPix2Pix
- 커스텀 애니메이션 적용
- Carla
- TensorFlow Object Detection Error
- 크롤링
- 기능과 역할
- 논문 분석
- Custom Animation
- AI Security
Archives
- Today
- Total
JSP's Deep learning
[Deep learning - Obeject Detection] TensorFlow Object Detection API(1) - 설치(with Mac OS) 본문
Deap learning/Object Detection
[Deep learning - Obeject Detection] TensorFlow Object Detection API(1) - 설치(with Mac OS)
_JSP_ 2023. 3. 5. 23:59TensorFlow Object Detection API를 사용하기 위해서 아나콘다 환경을 구성한다. 아나콘다 환경이 필수적인 것은 아니지만 TensorFlow의 버전을 관리하기에 용이하므로 아나콘다 환경을 사용한다.
1. Anaconda 환경 설치
- 다운로드 및 설치
- 다운로드 링크 : https://www.anaconda.com/products/distribution#macos

- Anaconda Prompt 실행(Mac에서는 설치 후 Mac 터미널을 실행하면 곧바로 적용된다)

- 가상환경 생성
(TensorFlow Object Detection API에서는 파이썬 버전 3.7이상을 권장한다)
conda create –-name “가상환경명” python=“version”
- 가상환경 생성 확인
conda env list
- 가상환경 활성화
conda activate object_detection
- TensorFlow 패키지 설치
(TensorFlow의 버전은 API을 따른다)
pip install --ignore-installed --upgrade tensorflow==2.5.0
- Tensorflow 정상 설치 확인
(다음 명령어를 실행했을 때, 결과가 정상적으로 출력되어야 한다)
python -c "import tensorflow as tf;print(tf.reduce_sum(tf.random.normal([1000, 1000])))"
- Pandas 패키지 설치(대표적인 데이터 분석 패키지)
conda install pandas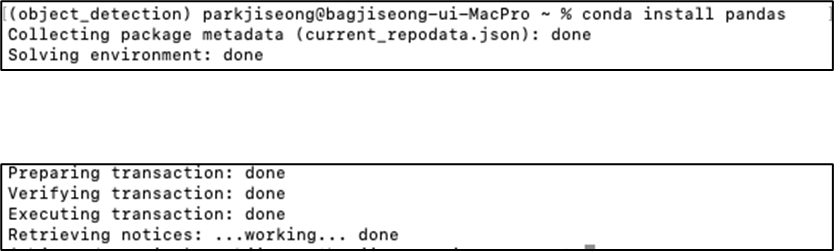
- 주피터 노트북 설치(선택사항)
conda install -c conda-forge jupyter
- 백그라운드 실행(로컬)
nohup jupyter notebook &
2. TensorFlow API 설치
TensorFlow Model Garden 다운로드
- 폴더 생성
- 생성된 폴더 내부에 다운로드
git clone https://github.com/tensorflow/models.git
Protobuf 설치
- brew 설치
/bin/bash -c "$(curl -fsSL https://raw.githubusercontent.com/Homebrew/install/HEAD/install.sh)"- protobuf 설치
brew install protobuf- pb 파일 생성
# 폴더 이동
cd Tensorflow/models/research/

# pb 파일 생성
protoc object_detection/protos/*.proto --python_out=.
COCO API 설치
- Visual C++ 설치
-
다운로드 링크 : https://code.visualstudio.com/download
-
VsCode 설치 후, VsCode에서 c++ extention install 진행
-
- COCO API 설치
pip install cython

pip install git+https://github.com/philferriere/cocoapi.git#subdirectory=PythonAPI

Object Detection API 설치
- TensorFlow/models/research 경로로 이동
cd ~/TensorFlow/models/research- 다음의 명령어 입력
cp object_detection/packages/tf2/setup.py .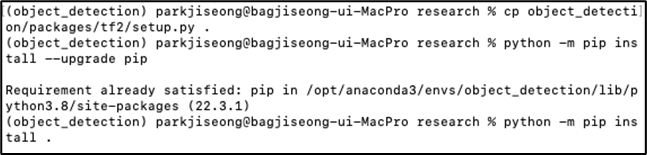
Object Detection API Test
- models/research/ 경로로 이동
- 다음의 명령어 실행
python object_detection/builders/model_builder_tf2_test.py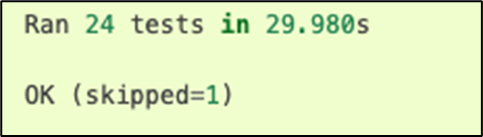
labelImg 패키지 설치
- 패키지 설치
pip install labelImg- 파일 다운로드 : https://github.com/tzutalin/labelImg/archive/master.zip
- 폴더 명을 labelImg로 바꾸고, addons/에 넣기

PyQt 패키지 설치
- TensorFlow/addons/labelImg 폴더에서 진행
conda install pyqt=5

pyrcc5 -o libs/resources.py resoures.qrc
labelImg 테스트
-
TensorFlow/addons/labelImg 경로로 이동
- labelImg 실행
python labelImg.py
참고
[1] https://tensorflow-object-detection-api-tutorial.readthedocs.io/en/latest/training.html
Training Custom Object Detector — TensorFlow 2 Object Detection API tutorial documentation
Whether you are using the TensorFlow CPU or GPU variant: In general, even when compared to the best CPUs, almost any GPU graphics card will yield much faster training and detection speeds. As a matter of fact, when I first started I was running TensorFlow
tensorflow-object-detection-api-tutorial.readthedocs.io
'Deap learning > Object Detection' 카테고리의 다른 글
'Deap learning/Object Detection' Related Articles
more


Comments